
This is a practical guide for those who want to install Google Tag Manager in WordPress. For those who don’t know, GTM is a tag manager (from Google) that makes the life of any developer, marketer, or website owner much easier. I will cover the two main methods of installing GTM on WordPress: (1) using a plugin and (2) editing the site template files. Let’s go!
If you do not yet have a Google Tag Manager account I suggest you read this article in full. If you already have an account, skip to the second step.
Creating a Google Tag Manager (GTM) account
Tempo necessário para esta implementação: 2 minutes
Creating a Google Tag Manager account
- Providing information
Go to the Tag Manager page and click on the “Free Trial” button. Enter your Google credentials.
- Creating the account
In the upper right corner click on the “Create Account” button.
- Configuring the Application
Then enter the account name, country, URL, and where you want to use the container (Web, iOS, Android, or AMP). Once you have entered this data, click on “Create”.
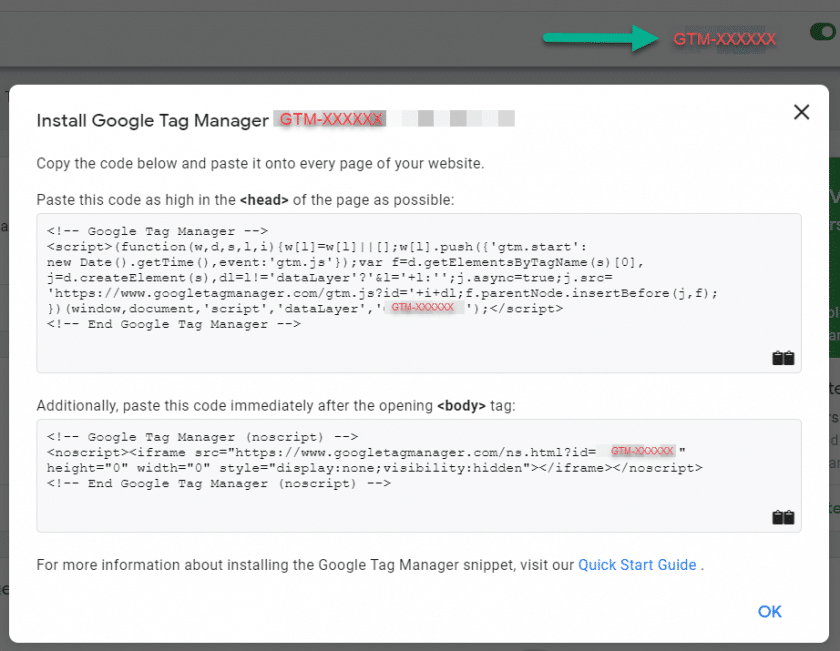
- Receiving the code
Now you will receive the codes and instructions to install the
<head>tag and also a code to install the<body>
Read also: “How to install Google Analytics on WordPress using a plugin”
Installing Google Tag Manager on your website
If you did not copy the codes provided when creating the account/container, log into your container and click on the ID shown at the top of the page:
The installation of these codes on the site can be done in two ways: (1) via the WordPress plugin or, (2) by editing the codes of the template used.
Before you choose one of the ways, keep in mind:
- Whether you have the necessary permissions to configure it the way you have chosen (some security plugins may prevent direct editing of template files for example).
- How is the site maintained (do you maintain it yourself or does a team of professionals take care of it for you).
- What other features do you want to implement along with Google Tag Manager on your WordPress site (custom dimensions in GA, Google Optimize, etc).
Installing Google Tag Manager on WordPress using a plugin
One of the great advantages of using a CMS like WordPress is the ability to add functionality through modules, in WordPress called plugins.
Probably the best (and the one I recommend) plugin for adding GTM to your WordPress site is the “DuracellTomi Google Tag Manager for WordPress”. It is installed like any other plugin:
- Log in to your administrative panel.
- Go to Plugins > Add New.
- Search for “Google Tag Manager”.
- Click “Install” on the DuracellTomi Google Tag Manager for WordPress plugin .
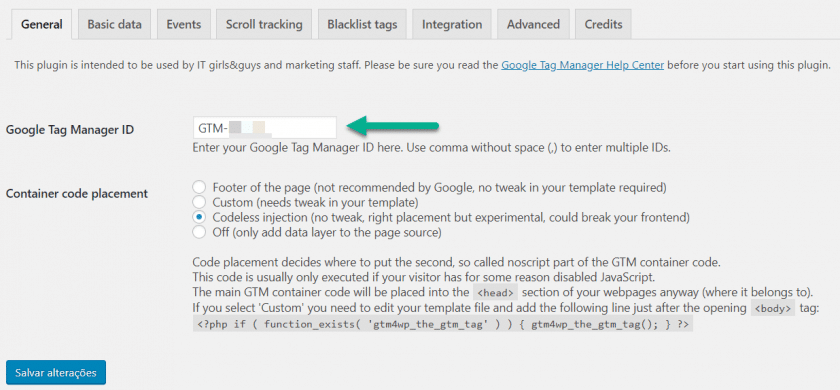
- Go to Settings > Google Tag Manager and enter your GTM container code in the appropriate field:
Using the plugin is the safest method for you to insert GTM to your site. Still, depending on your site settings, quality of your theme’s code, and plugins used there can be setbacks.
The <head> script is added correctly to your site. It is essential for the functioning of GTM on the site.
The script <body> is an iframe snippet that acts as a replacement for users with JavaScript disabled (very small number of users). Because WP does not have a hook for inserting custom code into the <body> tag, by default it is added to the footer. This is not ideal because it reduces the probability of a tag being triggered. It will still work but only after the whole page has loaded.
If you need the <body> tag to be fired at the correct location, you can choose a custom tag injection method.
On my site the Codeless Injection method, but I make sure that my theme is aligned to this type of GTM code injection.
To make sure that the chosen injection method is working, perform tests in the main browsers.
Advantages of this method:
- This method automatically activates multiple dataLayer variables that would only be available with a lot of customization. With these variables active you can for example extract data for GA such as author, year of publication, user type, etc.
- In the integrations tab you will find the possibility to integrate other features such as ContactForm 7, WooCommerce and AMP.
- In addition you can inject the Page Hiding Snippet from Google Optimize to run your experiments more safely.
Installing Google Tag Manager on WordPress by editing the template
Before making any changes to your theme make sure you have the knowledge to do so. My suggestion is that you avoid making changes to your template files. If you choose this method, try to use best practices, adopting a child theme so that your changes are not lost when your parent theme is updated.
Here is what you need to do:
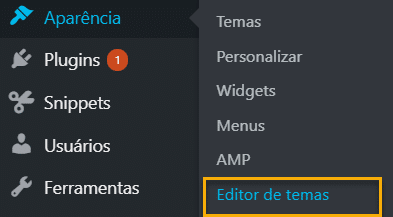
In the administrative panel, go to Appearance > Theme Editor:
Select the theme used and insert the GTM tags in the appropriate places:
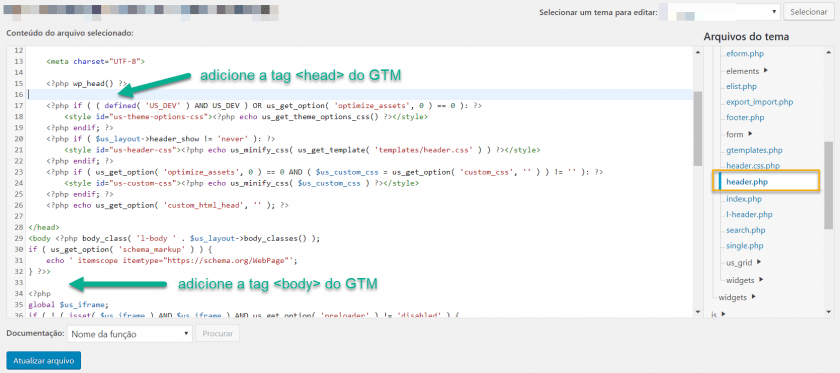
Click “Update File” and you are ready to use GTM.
Read also: How to install Google Analytics using Google Tag Manager
Testing the GTM Installation
Once the installation phase is over, let’s check that the chosen method has been implemented correctly.
There are a few ways for you to test that your GTM was installed correctly. My recommendation is for you to use the following two methods to make sure everything is right.
Method 1: through the page’s source code
Go to your site, right-click on the page, then click “View Page Source”. A new tab will open with the source code for your page. Something like this:
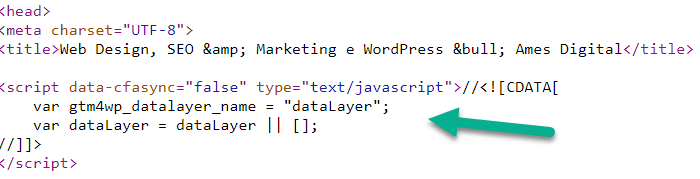
Make sure that both GTM tags are implemented. Test on all pages to make sure it is implemented correctly.
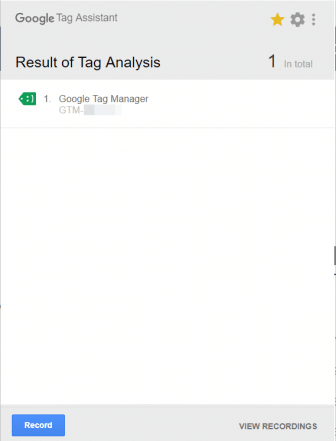
Method 2: Using Google’s Tag Assistant
Google provides an extension that can be added to your browser to quickly check implemented tags, Tag Assistant.
Install the extension. Go to your site and click on the extension. It will display the implemented tags.
If your Google Tag Manager tag is ok you can start enrolling and triggering tags (Google Analytics, Hotjar, Facebook Pixel, etc) within GTM.
Now it’s up to you! What method did you use to insert GTM into your WordPress site? What tags do you use or intend to use? Do you have any questions or tips to share?
Continue reading: Digital Marketing Metrics: which ones are important?
Continue reading: Marketing Metrics: Partner Metrics